
Collaboration Skills: Relationship Building
Strong collaboration starts with strong relationships.
Before students can collaborate meaningfully, they need to feel safe, seen, and connected. The strategies below help build that foundation, creating space for students to practice trust, communicate with purpose, and develop the habits that make deep collaboration possible.
Want the full context and more background?
EXPLORE THE STRATEGIES
Relationship Building
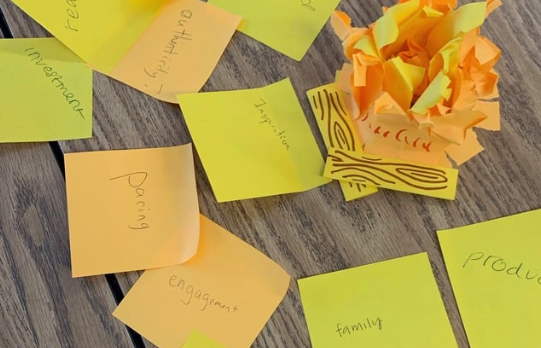
Campfire
Original Source: Gamestorming – Campfire
Optional Resource: Padlet Template Example
Group Size: 3 to 5 students
Grade Level: K–12
Duration: 15–45 minutes
What It Is
In this relationship-building strategy, small groups tell stories to each other. Their group experience is captured through a series of single words on sticky notes or note cards. Campfire creates small group intimacy and connections. You can learn more about Campfire from Gamestorming.com
Getting Ready
Generate a set of 10-15 random words or images that can be used to connect to experiences. For example, at the start of the school year, a teacher might use "summer," "water," "family," "heat." There is one set of words/images per group. These need to be placed with each group, along with blank notes and pens. Optionally, you can use a digital visual format like this Padlet template to share examples or model how it might look.
How to Do It
-
The teacher tells the class that the storytelling time will begin. We call this "lighting the campfire."
-
A volunteer from each group opens the storytelling by selecting one of the words or images from the word bank, sharing the word/image, and telling a story that is associated with that word. The rest of the group listens and may jot down words connected to their own stories.
-
Once the storyteller is done, they affix the first word to their group space.
-
The next player either shares a word they wrote down or selects a new one and tells a loosely connected story. They then affix that word to the group space in a connected manner.
-
This continues until the campfire is “put out” by the teacher.
-
[Optional] Groups may silently visit each other’s story threads to appreciate the different connections made.
Possible Sticking Points
-
Some students may feel hesitant to tell a personal story in a small group, especially early in the year. Offer light, universal words and model vulnerability.
-
Groups may struggle to connect stories using a shared thread. Consider modeling this as a whole class.
-
Some students may rush the activity. Encourage listening by assigning rotating group roles.
Facilitation Tips
-
Set the tone for storytelling with culturally relevant examples or metaphors that encourage openness and reflection.
-
Do not require whole-class share-outs; the power of this activity lies in the intimacy of the small group.
-
With K-2 learners, use images instead of words and provide strong modeling. Teachers should also manage time for each storyteller.
Why Should I Do This?
-
Builds authentic connections through narrative and listening
-
Supports creativity, oral communication, and empathy
-
Helps students express themselves without fear of being “wrong”
-
Easily adaptable to academic content or personal storytelling
Relationship Building
Morning Meeting
Original Source: Responsive Classroom – Morning Meeting
Group Size: Whole class
Grade Level: K–6, or advisory classes 7–12
Duration: 20–30 minutes
What It Is
Morning Meeting from Responsive Classrooms is intended to build a strong sense of community by setting all learners up for success through personal connection. Each morning for twenty to thirty minutes, learners and teachers gather together in a circle and interact with one another on various topics that help build social, emotional, and academic skills.
Getting Ready
-
Rearrange your classroom (or designate a space) so all students and adults can comfortably sit in a circle.
-
Prepare a short, encouraging Morning Message for the class.
-
Choose a quick group activity—something fun, engaging, and inclusive (e.g., simple games, songs, cheers, rhythm patterns).
How to Do It
-
Everyone enters the circle space. Once seated, learners and teachers greet one another by name.
-
Learners are invited to share information about important events in their lives. Listeners may respond empathetically or with questions.
-
Everyone participates in a brief, lively activity that fosters group cohesion and social-emotional or academic skills (e.g., a cheer, game, or song).
-
Students read and unpack a short message written by their teacher to set the tone for the day.
Possible Sticking Points
-
Some learners may dominate the conversation while others remain quiet. Reinforce equity of voice with clear participation expectations.
-
Students might begin seeing the activity as routine rather than meaningful. Regularly remind them of its purpose.
-
Seating arrangements may limit connection—keep the circle consistent and close.
Facilitation Tips
-
Invite all adults in the room to participate—it builds connection and models inclusivity.
-
Praise learners for participating, even if they’re hesitant or unsure of what to say.
-
Use visual or musical prompts to engage younger learners (e.g., drumming rhythms, hand claps).
-
Normalize the space: make it clear that students don’t need “perfect” answers—just presence and effort.
-
Keep participation equitable by prompting quieter students and monitoring “air time.”
Why Should I Do This?
-
Builds a strong classroom community and a daily sense of belonging
-
Gives students space to be seen and valued
-
Encourages listening, empathy, and self-expression
-
Creates a reliable routine that centers connection before academics begin
Relationship Building
What Are You Doing? Improv Game
Original Source: Oregon Educator Network – What Are You Doing?
Group Size: 7 to 15 students
Grade Level: K–12
Duration: 20 minutes
What It Is
An improv game from Oregon Educator Network that requires quick thinking and dissociation. Playing this game together creates a safe environment in which learners take risks and laugh together. It can be beneficial to build relationships in low-stakes activities that are not connected to content. These relationships will be essential to high-functioning teams and a healthy classroom culture.
Getting Ready
Designate a large open space in your classroom, hallway, or multi-use area where students can move safely and be seen clearly. Create lines of 7–15 students. Each line plays separately. Before starting, model one or two rounds so students understand how the game works. If helpful, prepare a visual list of movement-based action ideas students can use for inspiration.
How to Do It
-
The first student at the head of a line begins miming an activity, such as washing a car.
-
After about 30 seconds, the next person in line approaches the person acting out the activity, and asks, “What are you doing?”
-
The person miming responds with an answer that is not related to the actual activity. For example, they might say, “I’m walking my dog.”
-
The second person begins to continue the mime of the first person (even though they may not know what they’re miming), and the first person moves to the back of the line.
-
After 30 seconds, the person who was third in line asks, “What are you doing?”
-
The entire process repeats until everyone in line has had a chance to mime.
-
At the end, each group tries to guess what they were miming. Then, ask the first person to reveal the answer.
Possible Sticking Points
-
Students may feel shy or silly acting in front of classmates. Set a positive tone and model first.
-
Some may forget the rule about giving a mismatched response. Post reminders or model examples.
-
Movement can get chaotic in small rooms. Adjust group size or spacing as needed.
Facilitation Tips
-
This game is meant to be fun. Praise learners for participating, even if they fumble for words. Encourage the class to congratulate each other after the game is played.
-
Keep the game moving. You might consider allowing a learner to pass on their first try.
-
Encourage learners to speak loudly so that others can hear what has already been said in the game.
-
Set a time limit: each player has 1 minute to act and guess.
Why Should I Do This?
-
Builds relationships through fun.
-
Creates a safe place to try and make mistakes.
-
Gets learners up and moving at any point in the day
-
Helps increase individual readiness to present in a low-stakes way.
-
Builds emotional intelligence by teaching learners to pay attention to non-verbal cues.
Relationship Building
What's in a Name
Original Source: SF-CESS
Group Size: Whole Class
Grade Level: K–12
Duration: 30-40 minutes
What It Is
What's in a Name from the San Francisco Coalition of Essential Small Schools is a community-building activity that provides the opportunity for all learners to share the history of their names, personal contexts, and listen with the intent to learn about one another. Through this experience, the value of learning and saying names properly helps to build dignity and respect within the learning space.
Getting Ready
Learners should have something to write on and something to write with, such as a journal, notebook, or a printed reflection sheet. The teacher may choose to chart responses or key takeaways—if so, prepare a section of the whiteboard or a piece of chart paper. Consider modeling your own name story first to build comfort and set the tone.
How to Do It
-
Explain to the class that often the first gift they receive is their name. Names are special - they have meaning, and much thought is put into their names.
-
Provide learners 5 minutes to journal about their names. You may use any of these prompts to guide their reflection:
-
What is your full name?
-
Where were you born? (for context)
-
What is the history of your name?
-
What does your name mean? Why did you get your name?
-
What nicknames do you have (if any)?
-
From where did they come?
-
What name do you prefer to be called?
-
-
Ask students to share their notes in teams or with the whole class. This will depend on the size of the class. If sharing with a team, have the teams introduce one another to the whole group.
-
As individuals share, learners should listen intently and make note of the uniqueness and diversity of each name, as well as connections. It may be helpful during this sharing period to chart some responses. If necessary, the teacher might provide additional contextual background information, such as details of the time period, culture, and experiences, to provide clarity on the name's origin.
-
After everyone has a chance to share, debrief the class about the experience to reflect on what they learned and why it matters. You might ask:
-
What did you take away from this activity?
-
What did you learn about your classmates, and why is this important to you?
-
How will knowing about your classmates' backgrounds help you be a better teammate in the future?
-
What are our next steps?
-
Possible Sticking Points
-
Some students may not know their name story. Offer alternate prompts, such as what they wish their name meant.
-
Sharing may be emotional or sensitive. Normalize a range of responses and allow students to opt out or share privately.
-
It may take more time than expected. Consider having a few students share each day over the course of a week.
Facilitation Tips
-
Younger learners will need additional scaffolding. You might facilitate several sessions in which a few of your learners share each time.
-
Preliterate learners may need to draw or respond verbally to the prompts. Limit the prompts to one or two at a time.
-
Speak to the value of knowing and saying someone’s name is important. It is the first step in creating a relationship based on respect and dignity.
-
Thank each individual for sharing and using their preferred name at the conclusion of their share.
-
This can be done at point in the year, but has the most value at the beginning of the school year or semester.
Why Should I Do This?
-
This activity is the first step towards getting to know one another, which will lead to more effective collaboration and teamwork.
-
Supports identity development and classroom belonging.
-
Fosters curiosity and appreciation for peers' backgrounds.
-
Builds an inclusive culture grounded in listening and respect.
-
Sets the tone for authentic connection and collaboration.
Explore All 4 Collaboration Strategy Pages
This is one of four pages in our Collaboration Skills series. Each one is packed with classroom-ready strategies connected to a key domain of collaboration:
-
Relationship Building: Build trust, connection, and a sense of belonging.
-
Goals & Progress: Support accountability through shared goals and routines.
-
Collaborative Thinking: Help students engage in collective idea generation and critical thinking.
-
Feedback: Teach students how to give, receive, and reflect on meaningful feedback.
Visit all four to strengthen student collaboration through clear, actionable practices.
